So more goodies arrived, an air filter, exhaust hangers and some rather smaller than expected traction mats for getting out of mud. The forecast rain was holding off so I thought I’d best get a bit of tinkering in while conditions were favourable.
First up was the dodgy fuse holder.. however after crimping up connections onto a new 30A holder, I realised I need thicker wire, so this is on hold pending tracking some down..

Next up changing the air filter to complete the basic service which has taken me 4 weeks including fresh oil and coolant, (note to self, current mileage 41,113) Of course being French, to simply remove the cover from the air filter housing in-situ would be too easy, cramped by the brake master cylinder and coolant expansion tank and various hoses (I’ve never seen an engine with so many rubber hoses flying about) it looked like it would be a case of removing surrounding bits of gubbins to remove the entire air box. At least the nuts holding various bits in place were all the same size at 10mm.
I first removed the cab air intake box, raked out the drain hose, then extracted various oil breather and hot air recirculating hoses and then popped the top off the distributor to access one of the lower fixing nuts. After stuffing tissues into the carburetor intake and open oil tubes to prevent dropping anything I would regret into them, I was then able to remove the air box assembly complete. This was assisted by the fact that one of the hoses connecting the bottom of the engine back to the intake was already severed. I believe this is something to do with cold start assistance which the van doesn’t really seem to need…


The old filter didn’t look too bad. Before I reassembled everything, I had a quick poke at the HT leads, which don’t look that old and contemplated extracting a spark plug to inspect it. That would have involved digging around the garage for a long enough socket and extension as they are buried ridiculously deep in the head. As Rudolph is actually running very well currently, I figured they are fine so left it for another day. If it ain’t broke etc.
Reassembly went better than expected and I cleaned things up a bit as I put them back together. I also checked the gearbox oil whilst in there and it is still reassuringly clean and full. Firing up the engine, Rudolph took a while to clear his throat as seems to be normal when left standing for a few days but once running ticked over nicely with noticeably less smoke than normal which I put down to the mild temperature rather than new air filter!
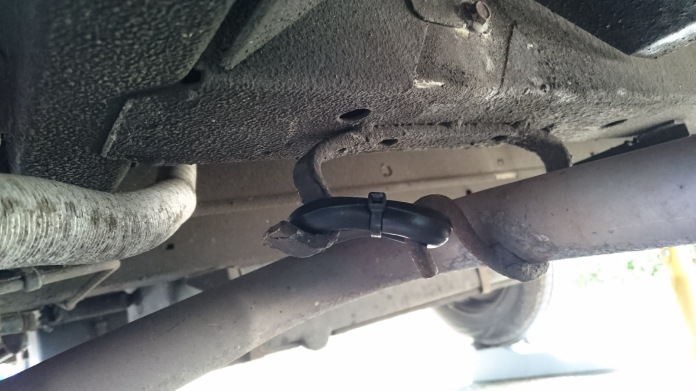
So next up was fitting the exhaust hangers. The front ones I actually bought the hangers for don’t appear to have any visible brackets to fix the exhaust to – whether they had fallen off at some point or where never there is and will remain a mystery… One of the rear donuts had perished and fell off when I prodded it, so after a bit of faffing with a big screw driver as a lever, I replaced this and cable tied it in place.
I think Rudolph was Waxoiled at some point as I can only marvel at the lack of rust visible underneath.
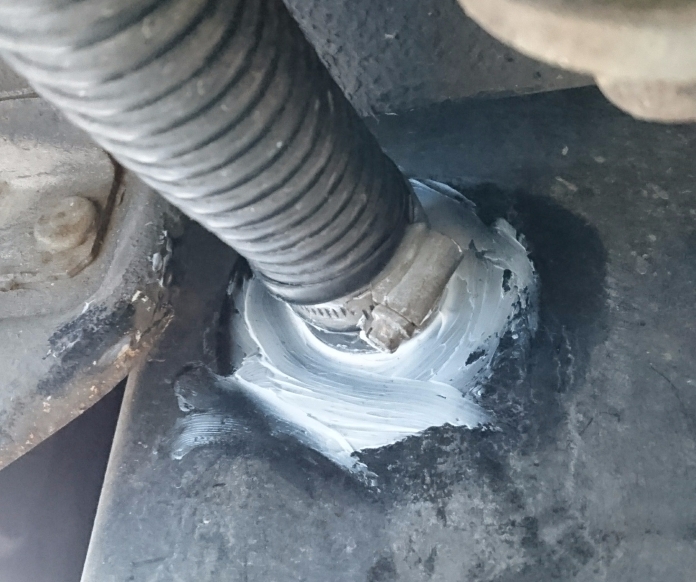
I then backed the van onto the ramps and stuck axle stands underneath to have a look at the leaking fresh water tank. Water drips from the filler hose and tank connection when we park at certain angles. A bit of poking about revealed the thread for the screw in fitting is gone, or if it wasn’t it is now… I cleaned up the mating surfaces and liberally applied some silicone mastic before sticking it back together. Not brilliant but if this doesn’t hold I’ll have to epoxy the fitting in place as the problem isn’t severe enough to warrant dropping the tank to either replace it or fit a larger diameter fitting.
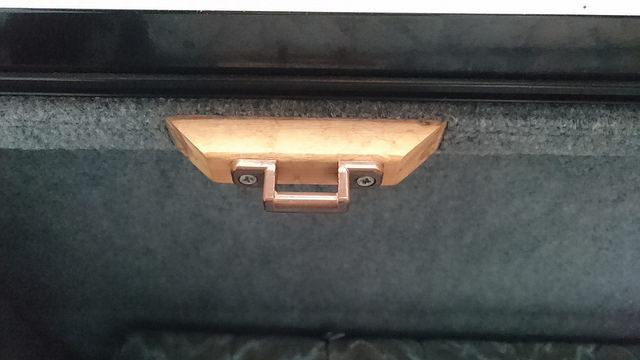
Final tasks for the morning were to glue the wooden drawer trim back on (a 2 minute job, I like this sort of fix) and to investigate the wonky and non-locking sliding door. Fiddling with the fixing bolts at the rear didn’t seem to yield any adjustment. At some point Rudolph has had a small prang in this area as the door is dented where the sliding door mechanism attaches and the fit of the parts has been affected. This was pointed out when I bought the van and I suspect that it accounts for the few mm of misalignment for the entire door, which still seems to seal properly and not have too many issues with closing ie. it doesn’t require an almighty slam which I have read, can actually crack the B pillar.
After a bit of scrambling about in confined spaces, I managed to remove the door card without breaking it and had a good rummage in the cavity trying to work out why the door locking tab is playing up. Nothing is obviously out of place and I managed to recover the tab to its correct position with a bit of judicious fiddling and a pair of pliers and this appears to have re-enabled the external push button to operate normally.

I can now lock and unlock the door (with a bit of patient key wiggling) from the outside and the thumb latch appears to work as before. I’m fairly certain that if I push the locking tab down from inside it will disappear again but I didn’t fancy dismantling the entire locking system, so I think I’ll just leave it as locking from outside only. It will be good to be able to open it from outside again especially as the weather is getting warmer. Unbelievably the door card went back on easily.
Inspecting the dodgy headlight connection revealed nothing obvious, a quick thump of the glass gets it working. I reckon I’ll need to replace the entire connector block as it doesn’t appear to come apart. I’ll look at this again when I revisit the fuse holder..